You can easily add your own customizable HostPapa Website Builder Form within the website builder. When someone fills in the form, their message will be emailed to the email address that you use to log into your HostPapa Website Builder account. You can easily change the address by clicking on the Settings link on your HostPapa Website Builder Form Widget.
HostPapa Website Builder forms include a CAPTCHA, which helps combat blank form submissions and spam. A common type of CAPTCHA requires the user to type letters or digits from a distorted image that appears on the screen. The CAPTCHA is added to your form automatically but you can remove it in the Edit menu.
Here’s how to add, customize and edit your HostPapa Website Builder Form Widget:
1. Click on Widgets > Forms.
2. Drag and drop the Form Widget onto your page.
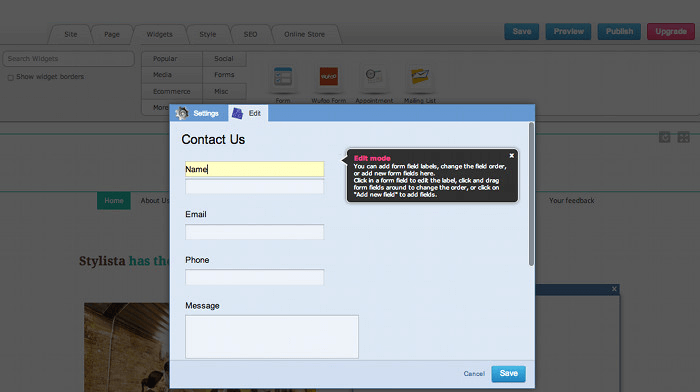
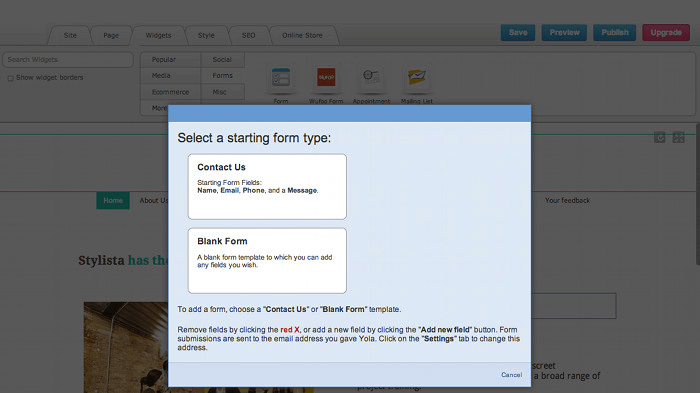
3. You have the option to choose a Contact Us or a Blank Form. Both forms allow you to add, delete, rename and move the location of your form fields.
4. To change the name of a field, click on the field name. You can delete the default text and add in your custom field name if you wish. You can also add default text to the text fields that your user will fill in.
5. You also have the option to change the name of the Submit button on the form to a name more appropriate to your form or business.
6. To delete a field, click on the red x in that particular field.
7. To move a field to another position on the form, drag and drop it up or down on the form. You can also use the blue dotted arrows below the red x to move the fields.
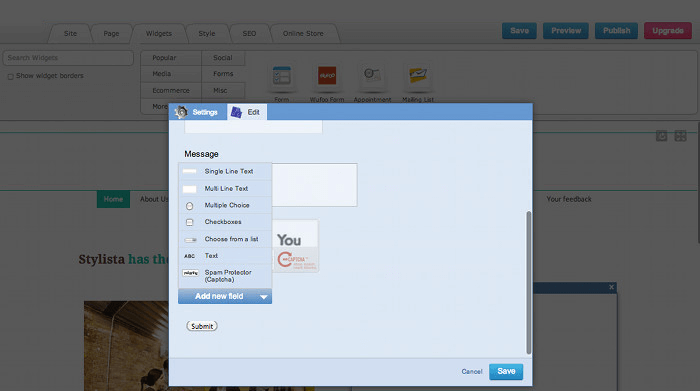
8. To add another field to your form, click on the Add new field drop down list.
9. You have the choice to add Single Line Text, Multi Line Text, Multiple Choice, Checkboxes, Choose from a list, Text and Spam Protector (Captcha).
10. Under the Settings tab is a field for editing the email address the form submissions are sent to, as well as a customizable completion message. This is the message that your site visitor will see after successfully submitting your form.
11. Once you are done customizing your form, click on Save.
12. Click on Preview to see what your form will look like once it’s published.
13. If you’re happy with your form, republish your site to make it live.